Raypak Pool Heater Troubleshooting Manual: A Comprehensive Guide
Navigating Raypak heater issues requires understanding systems‚ error codes like ROL and F01‚ and components like the gas valve and control board.
This guide offers detailed solutions for common problems‚ ensuring a warm pool season!
Understanding Raypak Pool Heater Systems
Raypak pool heaters‚ manufactured by Rheem‚ are renowned for their durability and efficiency‚ but even the best systems require occasional troubleshooting. A fundamental understanding of how these heaters operate is crucial for effective diagnosis and repair. Raypak heaters utilize a sophisticated system involving a gas valve‚ burner‚ heat exchanger‚ and a control board to regulate temperature.
The process begins with the control board receiving a signal from the thermostat‚ initiating the gas valve to open and supply gas to the burner. The burner ignites‚ heating the heat exchanger‚ which in turn warms the pool water as it circulates through. Crucially‚ safety features like the high-limit switch and flame sensor constantly monitor the system‚ preventing overheating and ensuring safe operation.
Understanding the interplay between these components is key. Issues can stem from a faulty gas supply‚ ignition problems‚ or even restrictions in water flow. Recognizing the function of each part allows for a systematic approach to pinpointing the root cause of any malfunction‚ ultimately leading to a quicker and more effective resolution. Proper maintenance‚ as we’ll explore later‚ is vital for optimal performance.
Common Raypak Pool Heater Error Codes
Raypak pool heaters employ a diagnostic system that utilizes error codes to signal specific malfunctions. Recognizing these codes is the first step towards effective troubleshooting. Some of the most frequently encountered codes include ROL‚ F01‚ and F02‚ each indicating a distinct problem within the system.
The ROL error‚ often related to ignition failure‚ suggests a problem with the spark ignition or gas supply. F01 signifies an overheat protection activation‚ indicating the high-limit switch has tripped‚ potentially due to low water flow or a malfunctioning thermostat. F02 points to a flame sense failure‚ meaning the heater isn’t detecting a consistent flame‚ which could be caused by a faulty flame sensor or gas valve issue.
Beyond these‚ other codes may appear‚ each requiring a specific diagnostic approach. Consulting the Raypak owner’s manual or a qualified technician is crucial for interpreting less common codes. Understanding the meaning behind these error messages allows pool owners to address issues promptly‚ preventing further damage and minimizing downtime. Accurate code identification streamlines the repair process significantly.
Error Code ROL: Detailed Explanation
The ROL error code on a Raypak pool heater signifies a “Roll Over Lockout” condition‚ fundamentally indicating an ignition failure. This means the heater attempted ignition‚ but failed to establish and maintain a stable flame within a specified timeframe. The system then locks out to prevent a dangerous build-up of unburnt gas.
Several factors can trigger a ROL error. These include insufficient gas pressure reaching the burner‚ a faulty ignition module unable to create a spark‚ or a dirty/corroded igniter. Air supply issues‚ such as blocked air intake vents‚ can also prevent proper combustion. Furthermore‚ a malfunctioning gas valve failing to open correctly will interrupt the gas flow.
It’s crucial to understand that a ROL error doesn’t necessarily pinpoint a single component. A systematic troubleshooting approach is required‚ starting with verifying the gas supply and inspecting the ignition system. Repeated ROL errors can indicate a more serious underlying problem requiring professional attention to ensure safe operation.
ROL Error: Ignition Failure Troubleshooting
When facing a ROL error‚ begin by visually inspecting the igniter for any signs of corrosion or damage. Clean the igniter with fine steel wool if necessary‚ ensuring it’s free of debris. Next‚ verify the ignition module is receiving power; a multimeter can confirm voltage at the appropriate terminals.
If power is present‚ test the igniter itself for continuity. A lack of continuity indicates a faulty igniter requiring replacement. Also‚ check the spark gap – it should be within the manufacturer’s specifications. A weak or intermittent spark suggests a failing ignition module.
Ensure all wiring connections to the igniter and module are secure and free from corrosion. A loose connection can disrupt the ignition process. If these steps don’t resolve the issue‚ consider a gas supply problem (addressed elsewhere) or a faulty control board‚ as it governs the ignition sequence. Remember safety first – disconnect power before any electrical work!
ROL Error: Gas Supply Issues
A ROL error frequently stems from inadequate gas supply. First‚ confirm the main gas valve to the heater is fully open. Check other gas appliances aren’t simultaneously drawing excessive gas‚ potentially reducing pressure to the heater. Verify the gas regulator is functioning correctly; a faulty regulator can’t maintain proper pressure.

Inspect the gas line for any kinks or obstructions that might restrict flow. A pressure test‚ performed by a qualified technician‚ will accurately measure gas pressure at the heater inlet. Low pressure confirms a supply issue. Ensure the gas type matches the heater’s specification (natural gas or propane).
If using propane‚ check the tank level. A near-empty tank will obviously cause ignition problems. Also‚ examine the gas valve itself for internal malfunctions. A professional should handle any gas line repairs or regulator replacements due to safety concerns. Never attempt to modify or repair gas components without proper training and certification.
ROL Error: Air Supply Problems
The ROL error can also indicate insufficient air for combustion. Raypak heaters require a specific air-to-gas ratio for efficient and safe operation. Obstructions in the air intake pathway are a common culprit. Inspect the air intake vent for debris like leaves‚ nests‚ or snow‚ ensuring clear airflow.

Verify the venting system is properly installed and free from blockages. Improper venting can lead to incomplete combustion and ignition failure. Check for any restrictions within the blower assembly itself; a malfunctioning blower won’t deliver adequate air. Ensure the heater’s location allows for sufficient ambient air.
Confined spaces can starve the heater of necessary oxygen. Wind conditions can also affect air supply‚ particularly with outdoor units. A qualified technician can assess the air-to-gas ratio using specialized tools. Addressing air supply issues is crucial for safe and reliable heater performance. Never operate the heater with a restricted air intake.
Error Code F01: Overheat Protection
The F01 error code on a Raypak pool heater signals activation of the overheat protection system. This safety mechanism shuts down the heater to prevent damage from excessively high temperatures. A primary cause is often restricted water flow‚ preventing adequate heat dissipation. Low water levels in the pool or a malfunctioning pool pump contribute to this issue.
However‚ the high limit switch itself could be faulty‚ triggering a false positive. Inspect the switch for continuity and replace if necessary. Airflow obstructions‚ though more commonly linked to ROL errors‚ can also contribute to overheating. Scale buildup within the heat exchanger restricts water flow and reduces cooling efficiency.
A thorough inspection of the entire system is vital. Check the pool pump‚ filter‚ and all associated plumbing for blockages or malfunctions. Regular maintenance‚ including heat exchanger cleaning‚ can prevent F01 errors. Always consult a qualified technician for complex troubleshooting.
F01 Error: Causes and Solutions
An F01 error indicates your Raypak heater has triggered its overheat protection. Common causes include insufficient water flow – a clogged filter‚ a failing pool pump‚ or closed valves restrict circulation. Scale buildup inside the heat exchanger dramatically reduces efficiency and heat transfer‚ contributing to overheating.
Another frequent culprit is a malfunctioning high limit switch. This switch safeguards against extreme temperatures; if faulty‚ it may prematurely shut down the heater. Air trapped within the system can also cause temperature spikes. Inspect for airlocks and ensure proper venting.
Solutions involve verifying adequate water flow‚ cleaning or replacing the filter‚ and inspecting the pump. Descaling the heat exchanger is crucial for optimal performance. Test the high limit switch with a multimeter and replace if defective. Finally‚ bleed any trapped air from the system. If the issue persists‚ professional service is recommended.
Error Code F02: Flame Sense Failure
The F02 error code on a Raypak heater signifies a flame sense failure‚ meaning the unit isn’t detecting a consistent flame during operation. This doesn’t necessarily indicate a lack of ignition‚ but rather an inability to maintain flame detection. Several factors can contribute to this issue‚ ranging from minor to more complex problems.

A common cause is a dirty or corroded flame sensor. This sensor requires a clean surface to accurately detect the flame. Low gas pressure can also lead to an unstable flame‚ triggering the error. Electrical issues‚ such as a faulty wire connection to the flame sensor‚ are also potential culprits.
Troubleshooting involves cleaning or replacing the flame sensor‚ verifying adequate gas supply pressure‚ and inspecting all wiring connections. A weak ignition module can also cause intermittent flame detection problems. If cleaning and checking connections don’t resolve the issue‚ professional diagnosis and repair are advised.
F02 Error: Troubleshooting Steps
When confronted with an F02 error‚ begin by visually inspecting the flame sensor. Carefully remove it and clean any carbon buildup with fine steel wool or sandpaper – ensure it’s spotless. Reinstall and attempt a heater restart. If the error persists‚ check the gas supply. Verify the gas valve is fully open and that there are no kinks or obstructions in the gas line.
Next‚ meticulously examine the wiring connecting the flame sensor to the control board. Look for loose connections‚ corrosion‚ or damaged wires. Tighten any loose connections and replace damaged wiring as needed. A multimeter can be used to test the continuity of the wiring.
If these steps fail‚ consider the ignition module. A failing module may provide insufficient voltage to maintain a stable flame. Professional testing is recommended. Always prioritize safety – turn off gas and power before any inspection or repair. If unsure‚ consult a qualified technician.

Low Water Flow Troubleshooting
Insufficient water flow is a frequent cause of Raypak heater issues. Begin by verifying the pool pump is functioning correctly; listen for unusual noises and ensure it’s running at the appropriate speed. Next‚ inspect the pool filter. A clogged filter drastically reduces water flow‚ triggering heater shutdowns. Clean or backwash the filter according to the manufacturer’s instructions.
Examine all suction and return lines for obstructions like debris or closed valves. Ensure skimmer baskets and pump strainers are free of leaves and other blockages. Check for leaks in the plumbing‚ as these can diminish water pressure. A properly sized and functioning pump is crucial; an undersized pump simply won’t deliver adequate flow.

Finally‚ assess the heater’s flow sensor. A faulty sensor may incorrectly indicate low flow‚ even when sufficient water is present. Professional testing and potential replacement may be necessary. Remember to always prioritize safety and disconnect power before inspecting any components.

Checking the Pool Pump and Filter
The pool pump is the heart of the circulation system‚ so initial troubleshooting must focus here. Verify the pump is receiving power and isn’t tripped on a breaker. Listen for unusual noises – humming‚ grinding‚ or rattling – which indicate potential mechanical failure. Inspect the pump basket for debris; a full basket restricts water flow and strains the motor.
Next‚ thoroughly examine the pool filter. A dirty filter is the most common cause of reduced flow. Depending on the filter type (sand‚ cartridge‚ or DE)‚ follow the appropriate cleaning procedure. Sand filters require backwashing‚ cartridge filters need rinsing‚ and DE filters demand backwashing and re-charging with DE powder.
Check the filter pressure gauge; a reading significantly higher than normal indicates a clogged filter. Ensure all connections to the pump and filter are tight and leak-free. Proper pump and filter maintenance are vital for efficient heater operation and longevity. Regular inspection prevents costly repairs.

High Limit Switch Issues
The high limit switch is a crucial safety device protecting the Raypak heater from overheating. If tripped‚ it shuts down the heater‚ often displaying an F01 error code. Before assuming a faulty switch‚ investigate the underlying cause of the overheat. Low water flow‚ a blocked heat exchanger‚ or a malfunctioning thermostat can all trigger the switch.
Locate the high limit switch – typically near the heater’s gas valve or control panel – and visually inspect it for damage. Use a multimeter to test for continuity; a lack of continuity indicates a failed switch. However‚ simply replacing the switch without addressing the root cause is a temporary fix.

Ensure adequate water flow and a clean heat exchanger. A properly functioning thermostat prevents excessive temperature rise. If the switch continues to trip after these checks‚ a deeper dive into the heater’s control system is necessary. Ignoring a tripped high limit switch can lead to severe damage.
Testing and Replacing the High Limit Switch
Before testing‚ always disconnect power to the Raypak heater! Locate the high limit switch – usually a small‚ circular or rectangular component near the gas valve. Use a multimeter set to the continuity setting. With the switch in its normal operating position‚ you should read continuity (a near-zero resistance). If there’s no continuity‚ the switch is likely faulty and needs replacement.
To replace‚ carefully note the wiring configuration before disconnecting the old switch. Obtain an exact replacement part – using the wrong switch can compromise safety. Connect the new switch’s wires identically to the old one‚ ensuring secure connections;
After replacement‚ restore power and test the heater. Monitor the temperature closely during the initial operation. If the new switch trips immediately‚ revisit the underlying cause of overheating – low flow‚ blocked exchanger‚ or thermostat issues. A properly functioning switch should remain closed under normal operating conditions‚ safeguarding the heater.
Gas Valve Troubleshooting
A malfunctioning gas valve is a frequent cause of Raypak heater issues. Begin by visually inspecting the valve for any physical damage – cracks‚ corrosion‚ or leaks. Carefully check gas line connections for tightness‚ but never use an open flame to check for leaks; use a soap and water solution. Bubbles indicate a leak.
If the valve isn’t opening (no gas flow)‚ check the voltage reaching the valve solenoid. A multimeter can confirm power delivery. If voltage is present but the valve remains closed‚ the solenoid itself may be faulty. A qualified technician should perform internal valve testing and cleaning.
Remember‚ gas valve repairs are best left to professionals due to the inherent dangers of working with gas. Incorrect repairs can lead to hazardous situations. Replacement requires proper gas line purging and leak testing to ensure safe operation. Always adhere to local gas codes and regulations.
Inspecting the Gas Valve for Malfunctions
Thorough inspection of the gas valve is crucial for diagnosing Raypak heater problems. Start by verifying the gas supply is turned on at the source and the shut-off valve near the heater is open. Visually examine the valve body for corrosion‚ physical damage‚ or any signs of gas leakage – a soapy water solution applied to connections will reveal bubbles if a leak exists.
Listen closely when the heater attempts to ignite. A clicking sound indicates the solenoid is receiving power‚ but silence suggests an electrical issue. Check the valve’s wiring connections for looseness or corrosion. Use a multimeter to confirm voltage is reaching the solenoid during the ignition sequence.
If the valve appears functional but gas isn’t flowing‚ internal components may be obstructed. Do not attempt to disassemble the valve yourself; this requires specialized knowledge and tools. Contact a qualified technician for internal inspection‚ cleaning‚ or replacement.
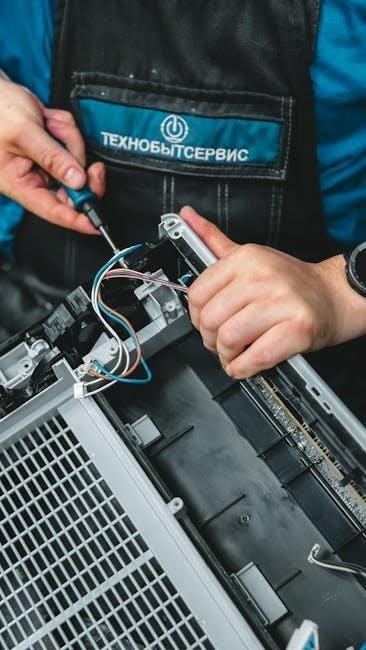
Raypak Heater Control Board Diagnostics
The control board is the ‘brain’ of your Raypak heater‚ managing all functions. Diagnosing issues requires a systematic approach. Begin by visually inspecting the board for burnt components‚ swollen capacitors‚ or any signs of physical damage. Carefully check all wiring connections – loose or corroded connections can cause erratic behavior.
Utilize the heater’s diagnostic features‚ if available‚ to read error codes. These codes provide valuable clues about the source of the problem. A multimeter is essential for testing voltage levels at various points on the board‚ comparing readings to the manufacturer’s specifications.
If the board appears damaged or testing reveals inconsistent voltages‚ replacement is often necessary. Always disconnect power before handling the control board. Ensure the replacement board is the correct model for your heater. Improper installation can lead to further issues; professional assistance is recommended.
Identifying and Replacing a Faulty Control Board
Confirming a faulty control board necessitates thorough testing‚ as other components can mimic its symptoms. After verifying power supply and wiring integrity‚ use a multimeter to check for continuity and proper voltage outputs. Compare readings against the Raypak service manual’s specifications for your specific model.
If the board consistently fails tests‚ replacement is the next step. Crucially‚ order the exact replacement part number to ensure compatibility. Before disconnecting the old board‚ carefully document the wiring connections – photographs are invaluable! Disconnect power entirely before proceeding.
Install the new board‚ meticulously reconnecting each wire to its corresponding terminal. Double-check all connections before restoring power. After powering on‚ observe the heater’s operation and verify that error codes have cleared. If issues persist‚ re-examine wiring and consider professional assistance.
Preventative Maintenance for Raypak Pool Heaters
Regular preventative maintenance significantly extends your Raypak heater’s lifespan and minimizes unexpected repairs. Annually‚ inspect the burner assembly for corrosion or debris‚ ensuring proper airflow. Clean the heat exchanger fins to maintain efficient heat transfer – a soft brush works best.
Check gas and water connections for leaks‚ tightening as needed. Inspect the high limit switch and gas valve for proper operation. Periodically‚ flush the heater’s internal waterways to remove scale and sediment buildup‚ improving performance.
Furthermore‚ verify the pool pump and filter are functioning optimally‚ as inadequate flow can trigger heater errors. A qualified technician should perform a comprehensive inspection every two to three years‚ including combustion analysis. Consistent upkeep prevents costly issues and ensures years of reliable pool heating.