Waring Pro Waffle Maker User Manual: A Comprehensive Guide
This manual details operation, safety, and maintenance for Waring Pro waffle makers, ensuring delicious results. It covers features like non-stick coatings and temperature controls.
Welcome to the world of perfectly crafted waffles! The Waring Pro Waffle Maker is designed for both home and commercial use, offering consistent, high-quality results. This appliance boasts features like sealed construction, allowing for liquid batter use, and durable materials such as scratch-resistant polycarbonate.
Whether you’re preparing breakfast for family or serving a crowd, this waffle maker delivers. Its powerful heating element and precise temperature control ensure waffles are cooked to your desired crispness. Waring Commercial prioritizes innovation and reliability, aiming to simplify your food preparation process and enhance your business’s profitability. Enjoy consistently delicious waffles with ease!
Safety Precautions
Prioritize safety when operating your Waring Pro Waffle Maker. Always ensure the unit is properly grounded and avoid using extension cords. Never immerse the appliance in water or any other liquid to prevent electric shock.
Exercise caution when handling hot surfaces; use oven mitts or pot holders. Supervise children closely when the waffle maker is in use. Do not operate the appliance with a damaged cord or plug. Waring Commercial warrants against defects when used with foodstuffs and non-abrasive liquids, but misuse voids the warranty. Disconnect the unit when not in use and allow it to cool completely before cleaning.

Understanding the Components
Your Waring Pro Waffle Maker consists of several key parts. These include the waffle plates, featuring a non-stick coating for easy release, and the robust heating element ensuring even cooking. The housing provides a durable exterior, while temperature controls allow for customized crispness.
The unit may also feature indicator lights signaling readiness and a locking mechanism for secure closure. Some models, like the WFP16SCD, utilize impact-resistant polycarbonate for visibility. The CB15 blender showcases a 1-gallon stainless steel container, demonstrating Waring’s commitment to durable components.
Waffle Plates & Non-Stick Coating
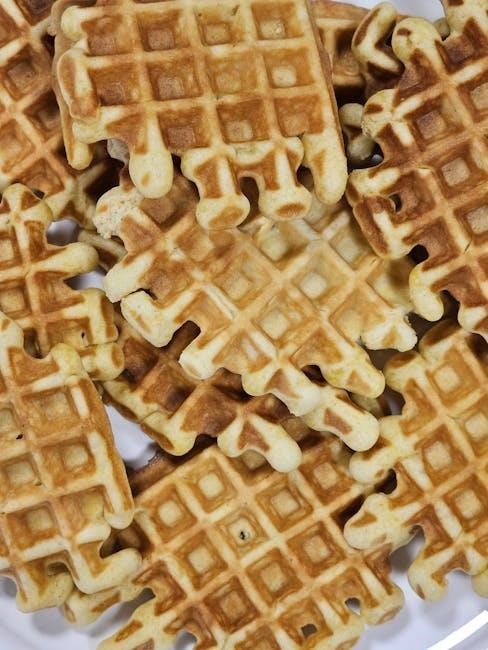
The Waring Pro Waffle Maker’s plates are designed for optimal waffle creation. They feature a specialized non-stick coating, preventing waffles from adhering and simplifying cleanup. While effective, this coating requires care; if sticking occurs, lightly coat the plates with cooking oil using a soft brush.
These plates are often constructed from high-quality materials, ensuring even heat distribution. Similar to the polycarbonate used in Waring’s food processors (like the WFP16SCD), the plates prioritize durability and scratch resistance. Maintaining the non-stick surface extends the waffle maker’s lifespan.
Heating Element & Temperature Control
The Waring Pro Waffle Maker utilizes a robust heating element for consistent and efficient waffle cooking. Precise temperature control is crucial for achieving desired crispness, ranging from light and fluffy to golden brown. The unit’s design ensures even heat distribution across the waffle plates.
Similar to the powerful 3.75 HP motor found in the Waring CB15 blender, the heating element is built for heavy-duty performance. Electronic keypad controls, if present, allow for accurate temperature adjustments. Proper temperature settings prevent burning and ensure perfectly cooked waffles every time.
Housing & Exterior Features
The Waring Pro Waffle Maker boasts a durable housing designed for long-lasting performance in commercial and home kitchens. Constructed with high-impact materials, similar to the polycarbonate used in Waring’s WFP16SCD bowl cutter mixer, it withstands frequent use. The exterior remains cool to the touch during operation, enhancing safety.
Its design prioritizes stability and ease of cleaning. The rugged construction resists scratches and maintains a professional appearance. The unit’s compact footprint saves valuable counter space. Waring Commercial products are known for reliability, and this waffle maker is no exception, built to withstand demanding environments.
Initial Setup & First Use
Before your first use, carefully unpack the Waring Pro Waffle Maker and inspect for any shipping damage. Ensure all components are present. Place the waffle maker on a stable, heat-resistant surface, away from flammable materials. Before plugging in, verify your electrical system matches the unit’s requirements.
It’s crucial to perform a cleaning cycle (detailed later) to remove any manufacturing residues. This prepares the non-stick plates for optimal performance. Familiarize yourself with the temperature control settings. Initial operation should involve a test batch to determine preferred crispness levels.
Cleaning Before First Use
Prior to the initial use of your Waring Pro Waffle Maker, a thorough cleaning is essential; Wipe down the exterior housing with a damp cloth to remove any dust or debris from shipping. More importantly, clean the waffle plates themselves.
Even with the non-stick coating, a residue from the manufacturing process may be present. Gently wipe the plates with a soft, damp cloth and mild detergent. Avoid abrasive cleaners, which can damage the coating. Dry completely before proceeding with the first waffle batch. This ensures optimal performance and food safety.
Adjusting Temperature Settings
Your Waring Pro Waffle Maker features adjustable temperature controls to achieve your preferred waffle crispness. Begin with a medium setting for standard waffle recipes. If you desire a lighter, fluffier waffle, reduce the temperature slightly. For a golden-brown, crispy exterior, increase the setting.
Experimentation is key! Monitor the waffle’s cooking progress and adjust accordingly. Higher temperatures cook faster but may burn if unattended. Remember that batter consistency and room temperature can also influence cooking time and ideal temperature.
Operating Instructions
Before first use, ensure the waffle maker is clean and properly assembled. Plug the unit into a grounded outlet. Allow the waffle maker to preheat – the indicator light will signal readiness. Carefully pour the prepared waffle batter onto the lower plate, avoiding overfilling.
Close the lid securely. Cooking time varies based on your desired crispness and the unit’s temperature setting. Once cooked, carefully remove the waffle with a non-metallic utensil. Repeat the process for subsequent waffles, enjoying consistently delicious results!
Preparing Waffle Batter
Successful waffles begin with quality batter! While recipes vary, a standard batter includes flour, sugar, baking powder, salt, eggs, milk, and melted butter. Ensure all ingredients are properly measured for consistent results; Whisk dry ingredients thoroughly before adding wet ingredients, mixing until just combined – avoid overmixing, which can lead to tough waffles.
For optimal texture, let the batter rest for 5-10 minutes before use. This allows the gluten to relax, resulting in lighter, fluffier waffles. Adjust sweetness and flavorings to your preference!
Pouring Batter & Cooking Process

Once the waffle maker is heated, carefully pour the batter onto the lower plate. Use just enough batter to cover the grid, avoiding overfilling which can cause overflow. Close the lid gently and latch if applicable. Cooking time varies depending on your desired crispness and the waffle maker’s temperature setting.
Generally, waffles are ready when the steam subsides and the indicator light signals completion. Avoid lifting the lid prematurely, as this can disrupt the cooking process and result in unevenly cooked waffles.
Achieving Desired Waffle Crispness
Controlling waffle crispness relies on temperature and cooking time. Lower temperatures and shorter times yield softer waffles, while higher temperatures and extended cooking create crispier results. Experiment to find your preference! If waffles stick, it indicates insufficient oil on the plates or a temperature that’s too low.
For extra crispness, avoid lifting the lid during cooking. Some models feature adjustable browning controls for precise customization. Remember, batter consistency also impacts the final texture – thicker batters generally produce fluffier waffles.
Cleaning & Maintenance
Regular cleaning extends the life of your Waring Pro waffle maker. Always unplug the unit and allow it to cool completely before cleaning. Wipe the exterior with a damp cloth; avoid abrasive cleaners. For the waffle plates, use a soft brush or silicone scraper to remove any batter residue.
If sticking occurs, lightly coat the plates with cooking oil. Never immerse the unit in water. Proper maintenance, including non-stick coating care, ensures optimal performance and prevents issues like uneven cooking or sticking.
Cooling Down & Disassembly
Before any cleaning or maintenance, complete cooling is essential for safety. Unplug the Waring Pro waffle maker and allow ample time for all components to reach room temperature. Avoid rushing this process to prevent burns.
Disassembly is generally minimal; most models don’t require extensive takedown for cleaning. Refer to your specific model’s diagrams if removable parts exist. Proper cooling prevents damage to the non-stick coating and ensures safe handling during maintenance procedures.
Cleaning Waffle Plates (Including Non-Stick Care)
Regular cleaning preserves the non-stick coating and extends the waffle maker’s life. After cooling, gently wipe plates with a soft cloth or sponge. Avoid abrasive cleaners or scouring pads, which can damage the surface. If waffles stick, lightly coat plates with cooking oil using a soft bristle or silicone brush.
For stubborn residue, a paste of baking soda and water can be effective. Ensure all traces are removed before the next use. Proper non-stick care prevents sticking and maintains optimal performance.
Exterior Cleaning & Storage
To clean the exterior, disconnect the waffle maker and allow it to cool completely. Wipe the housing with a damp cloth; avoid immersing it in water. Mild dish soap can be used for stubborn grime, but ensure it’s thoroughly rinsed and dried.
Store the waffle maker in a cool, dry place. Secure the lid, if applicable, to protect the plates. Proper storage prevents dust accumulation and ensures longevity. Avoid wrapping the cord tightly to prevent damage.
Troubleshooting Common Issues
If waffles stick, ensure the plates are properly coated with cooking oil using a soft brush or silicone applicator. For uneven cooking, verify batter is evenly distributed. If the unit doesn’t heat, check the power cord and outlet.
Consistent issues may indicate a need for warranty service. Avoid abrasive cleaners, as they can damage the non-stick coating. Always unplug the unit before attempting any troubleshooting steps to prevent electrical shock.
Waffles Sticking to Plates
Waring waffle makers feature a non-stick coating, but sticking can occur over time with use. To remedy this, gently coat the waffle plates with cooking oil using a soft-bristled or silicone brush before each batch. Avoid metal utensils that can scratch the surface.
Ensure the plates are clean and free of batter residue between uses. If sticking persists, contact Waring customer support, as it may indicate a coating issue covered under warranty.
Uneven Cooking
If your waffles are cooking unevenly, first ensure the batter is properly mixed and poured evenly onto the plates. Check that the waffle maker is on a level surface for consistent heat distribution.
Adjusting the temperature setting can also help; a slightly higher setting might resolve the issue. Avoid opening the lid prematurely during the cooking cycle, as this can disrupt the process. If problems continue, consult Waring’s support for further assistance.
Unit Not Heating
If the Waring Pro waffle maker isn’t heating, verify it’s securely plugged into a functioning electrical outlet. Check the power cord for any visible damage; do not use if compromised. Ensure the unit has fully cooled down from a previous cycle before attempting to restart it.
Some models have a reset button – consult your specific model’s diagram. If the issue persists, avoid self-repair and contact Waring Commercial’s customer support for professional assistance and potential warranty claims.

Warranty Information
Waring Commercial warrants each new Waring Commercial product to be free from defects in material and workmanship for one year from the date of purchase. This warranty applies when the product is used with foodstuffs, non-abrasive liquids (excluding detergents), and semi-liquids, and hasn’t been overloaded beyond its rated capacity.
The warranty doesn’t cover damage from misuse, abuse, alterations, or accidents. To obtain warranty service, contact Waring Commercial with proof of purchase for instructions and potential repair or replacement options.
Waring Commercial Products – General Warranty Details
Waring Commercial provides a one-year warranty on all new commercial products, covering defects in materials and workmanship from the original purchase date. This coverage is contingent upon proper use with appropriate foodstuffs and non-abrasive substances, excluding detergents. Damage resulting from exceeding specified load limits, alterations, or accidental damage is not covered.
To initiate a warranty claim, customers must provide proof of purchase and contact Waring Commercial for guidance on repair or replacement procedures. This warranty reflects Waring’s commitment to quality and customer satisfaction.
Additional Waring Commercial Equipment Overview
Waring Commercial offers a diverse range of foodservice equipment beyond waffle makers, including powerful blenders like the CB15, designed for high-volume use – capable of 100 drinks daily. They also produce combination bowl cutter mixers (WFP16SCD) suitable for both dry and liquid food preparation, featuring durable polycarbonate construction.
Furthermore, Waring’s immersion blenders excel in restaurants and kitchens, efficiently mixing soups, sauces, and dressings directly in pots. Waring prioritizes innovation, reliability, and value, aiming to enhance customer profitability.
Waring CB15 Blender Features
The Waring CB15 is an ultra-heavy-duty blender engineered for demanding commercial environments, handling up to 100 drinks per day with ease. Its robust 3.75 HP motor effortlessly chops, mixes, and shreds large quantities, even with extended blending times.
Featuring a durable, one-gallon stainless steel container with convenient dual handles for pouring and secure lid clamps, the CB15 prioritizes both performance and safety. Electronic keypad controls offer precise operation, making it a reliable workhorse for any busy kitchen.
Waring Immersion Blenders – Applications
Waring Immersion Blenders are versatile tools designed for professional kitchens, ideal for restaurants, large-scale food preparation, and smaller culinary businesses. They excel at mixing, liquidizing, and achieving perfect consistency in soups, sauces, and various culinary creations.
Operate directly within pots to effortlessly blend fish soups, stews, creams, salad dressings, pancake mixes, pastes, sauces, mayonnaise, and much more. These blenders streamline food prep, reducing transfer times and simplifying the cooking process, offering efficiency and precision.